We've all been there. You're building a UI, there's a section that needs an image, and you spend hours scrolling through stock libraries trying to find something that fits. The colors are wrong. The composition is off. The vibe doesn't match.
What if you flipped the process? Instead of finding an image to fit your UI, you create an image that's designed specifically for it.
Step 1: Start With the UI
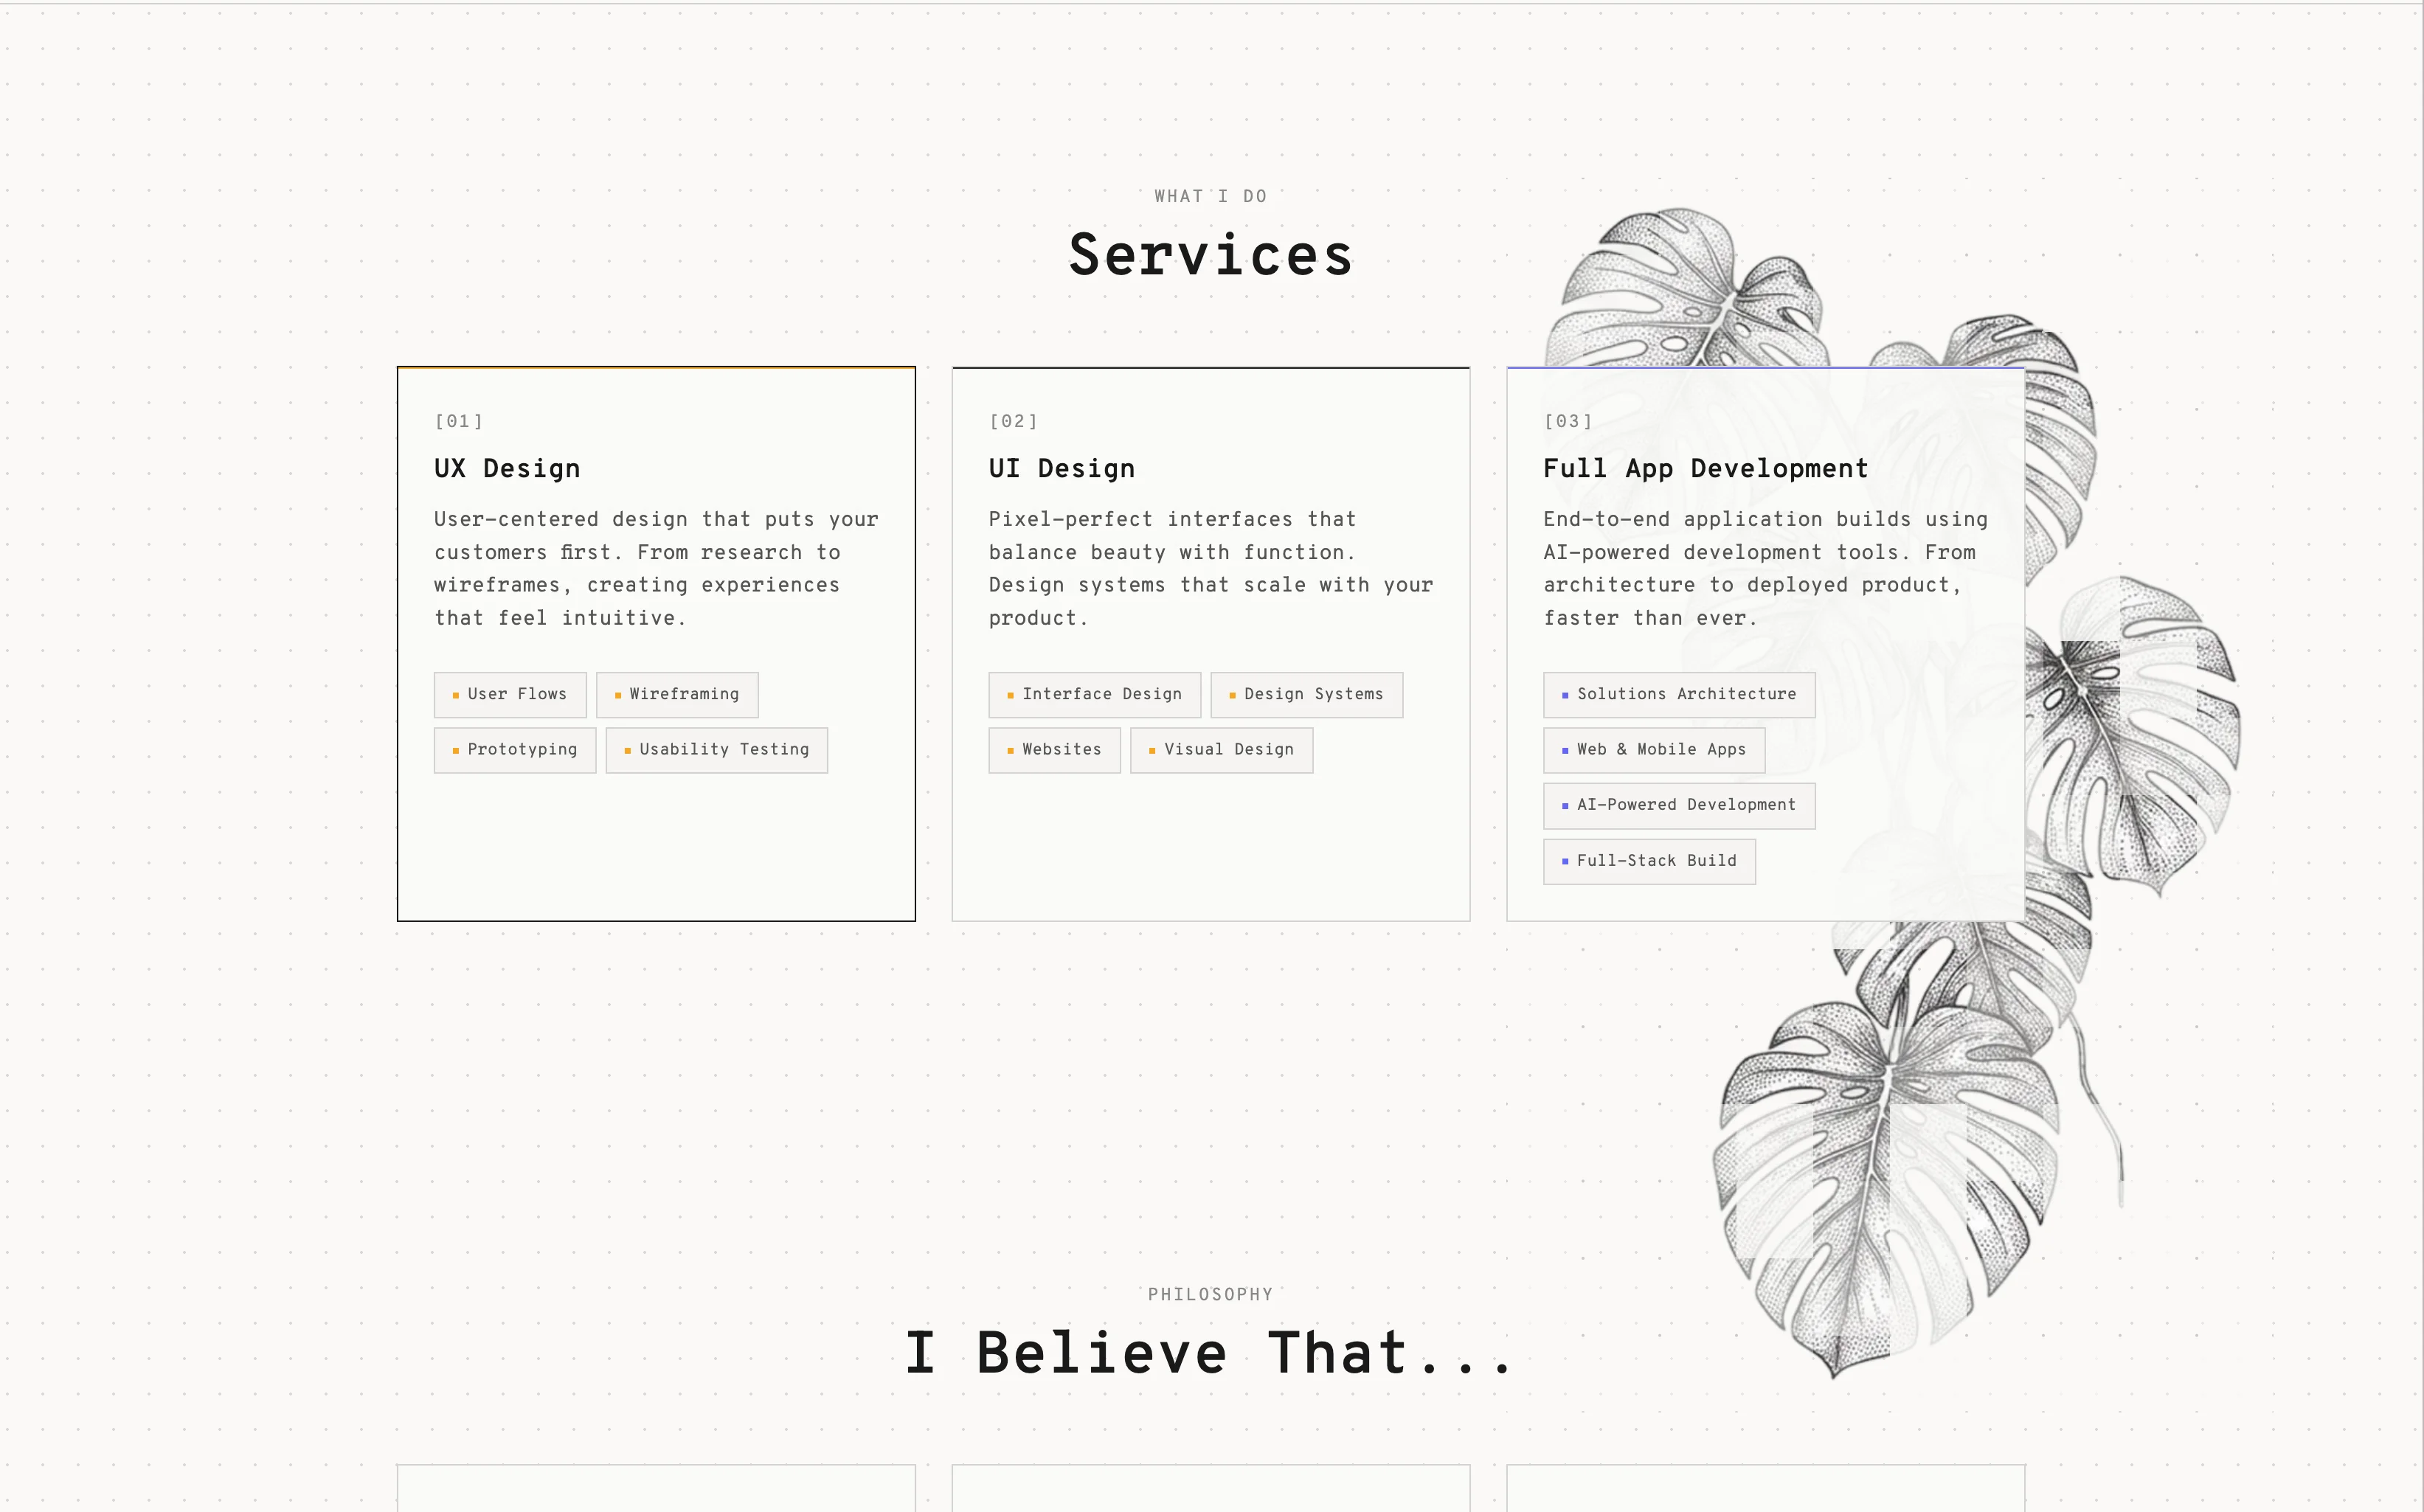
I had a section on a page that needed a decorative image. There was already a placeholder there, but it wasn't right. Instead of hunting for a replacement, I took a different approach.
I started by taking a screen grab of the section exactly as it was. The existing image, the layout, the surrounding elements — everything. This became my canvas.
Step 2: Generate in Context
I knew I wanted something organic to contrast with the digital UI. A monstera plant felt right — maybe a bit cliché, but sometimes clichés work for a reason.
I took my screen grab into Figma and used Nano Banana Pro to generate a monstera plant hanging down from the top right of the section, replacing the placeholder. The AI understood the context because it could see exactly where the image needed to sit.
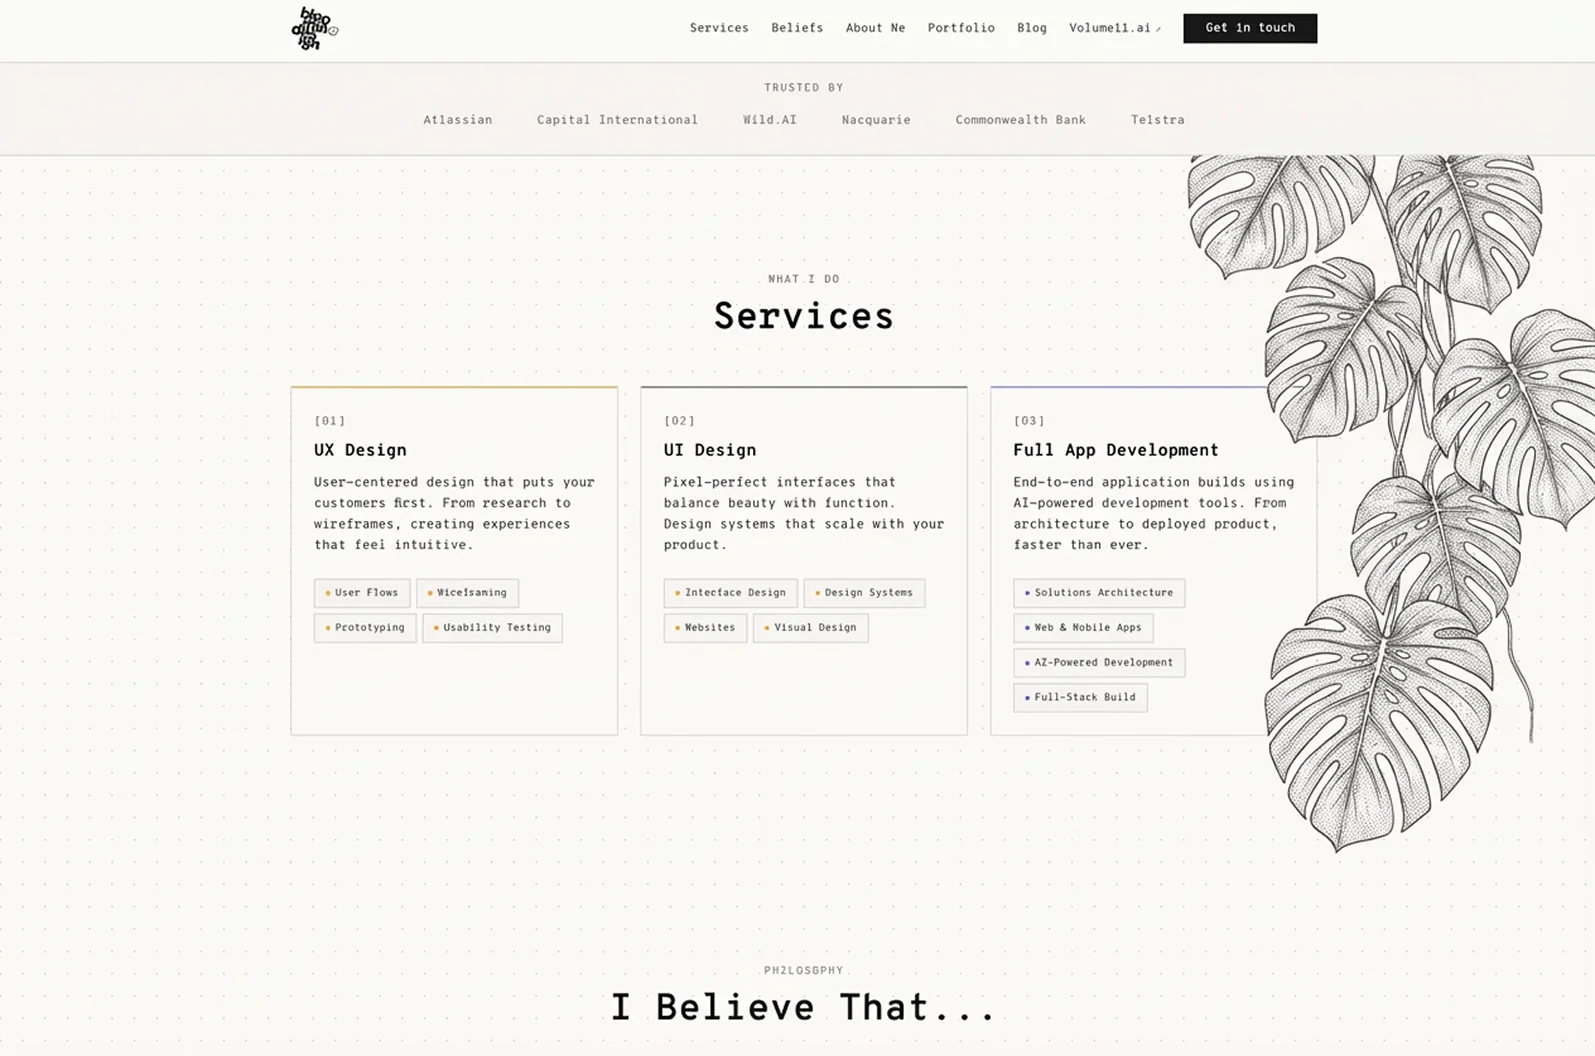
The result was promising. The plant integrated naturally with the existing layout because it was generated with that layout in mind.
Step 3: Extract the Asset
Now I had a nice composition, but I needed just the plant as a standalone asset. I asked Nano to remove the UI elements, leaving only the monstera.
"remove ui and leave just plant"

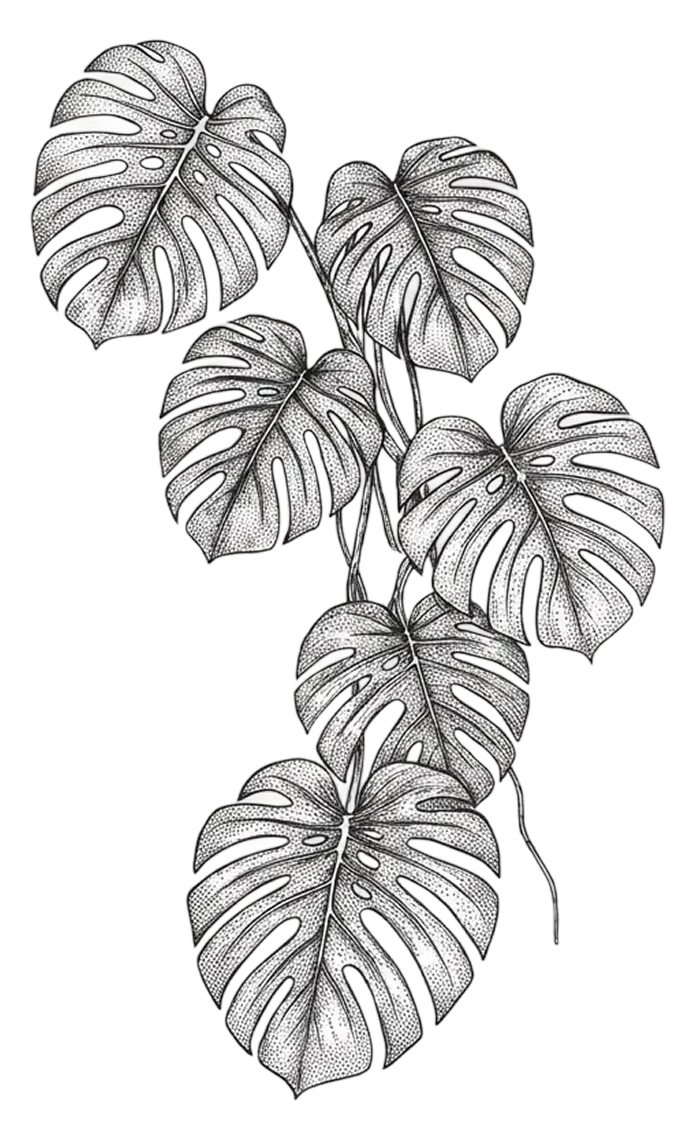
From there, it was standard asset prep: crop it down, then use Figma's "Remove background" tool — just highlight the image and it gives you the option.
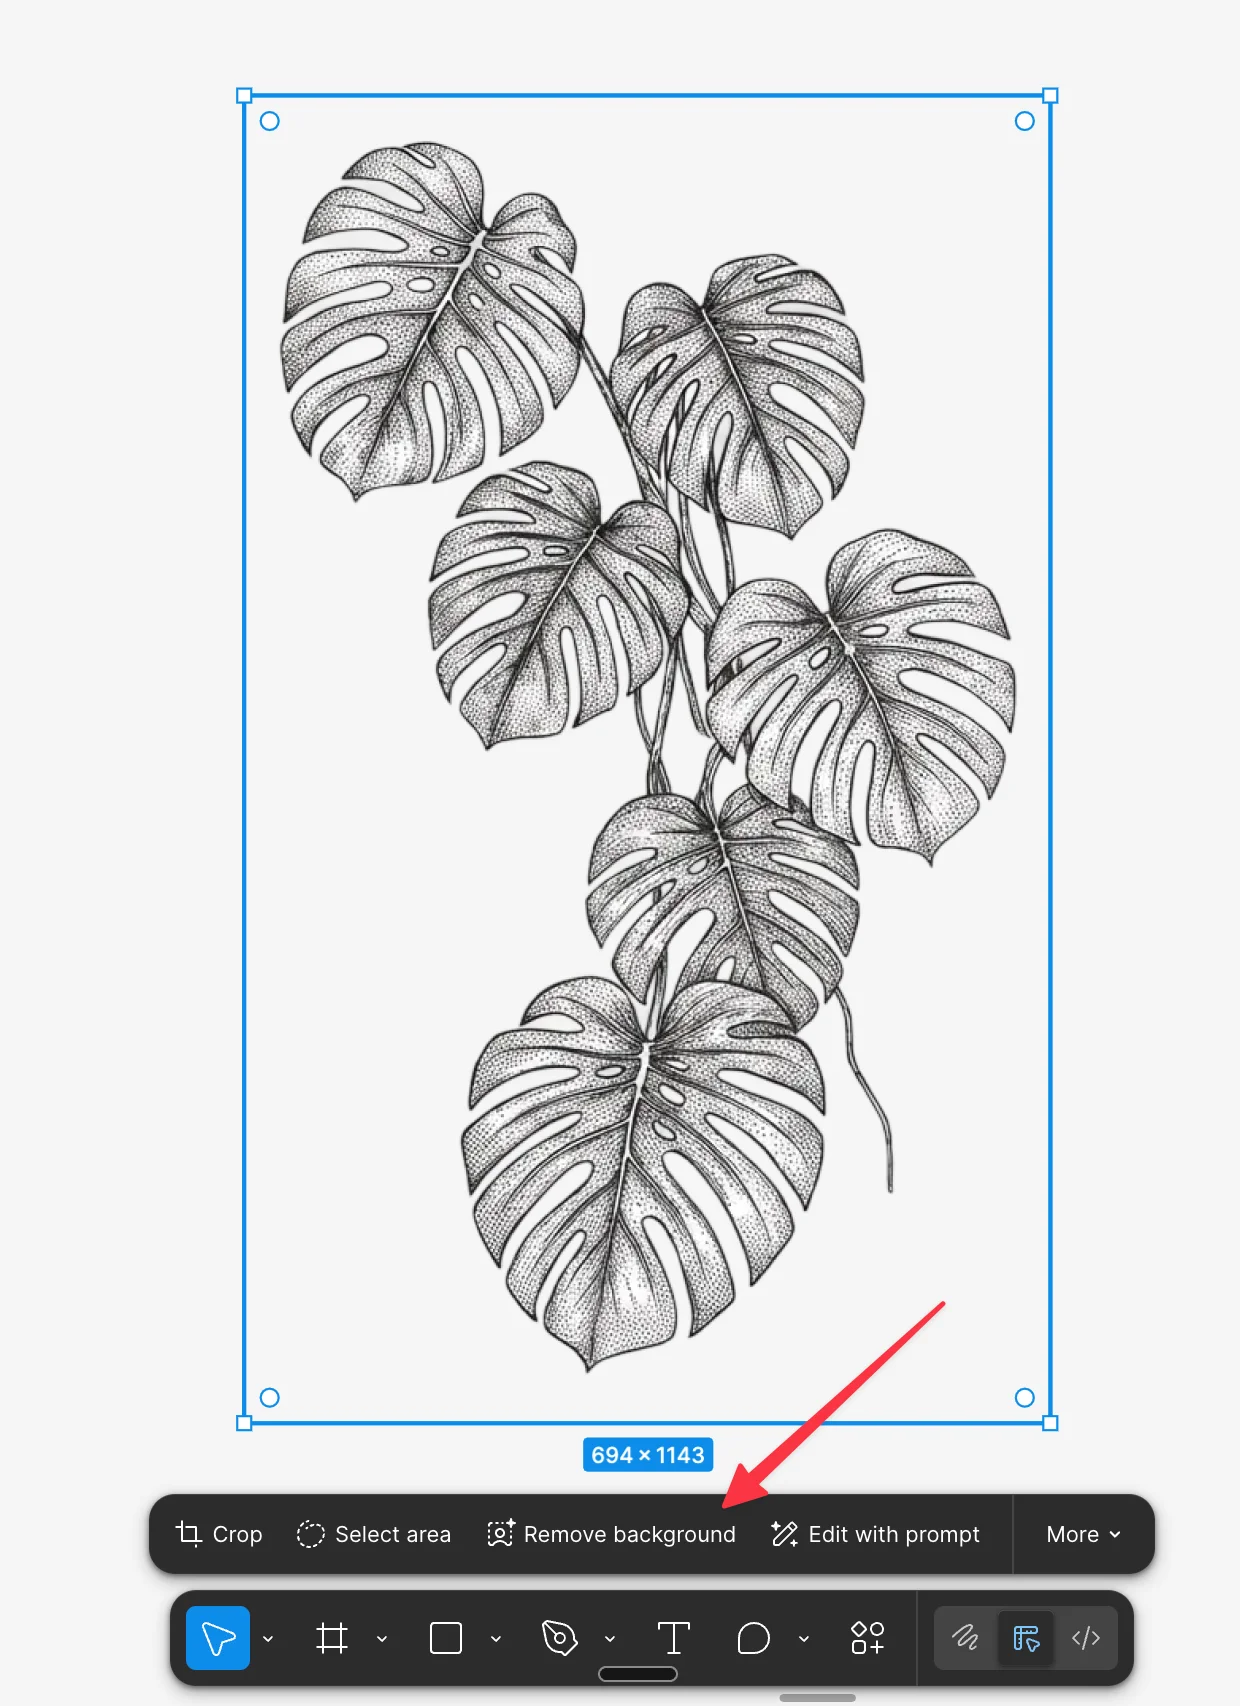
Finally, I exported the image from Figma at the exact size and dimensions I needed. Clean PNG ready for use.
Step 4: Animate and Place with AI
I took the asset into my image generation animation tool to give it some life. Then came the interesting part — placing it back into the actual codebase.
Using an AI coding assistant, I simply prompted: "Please add this and replace the existing image."
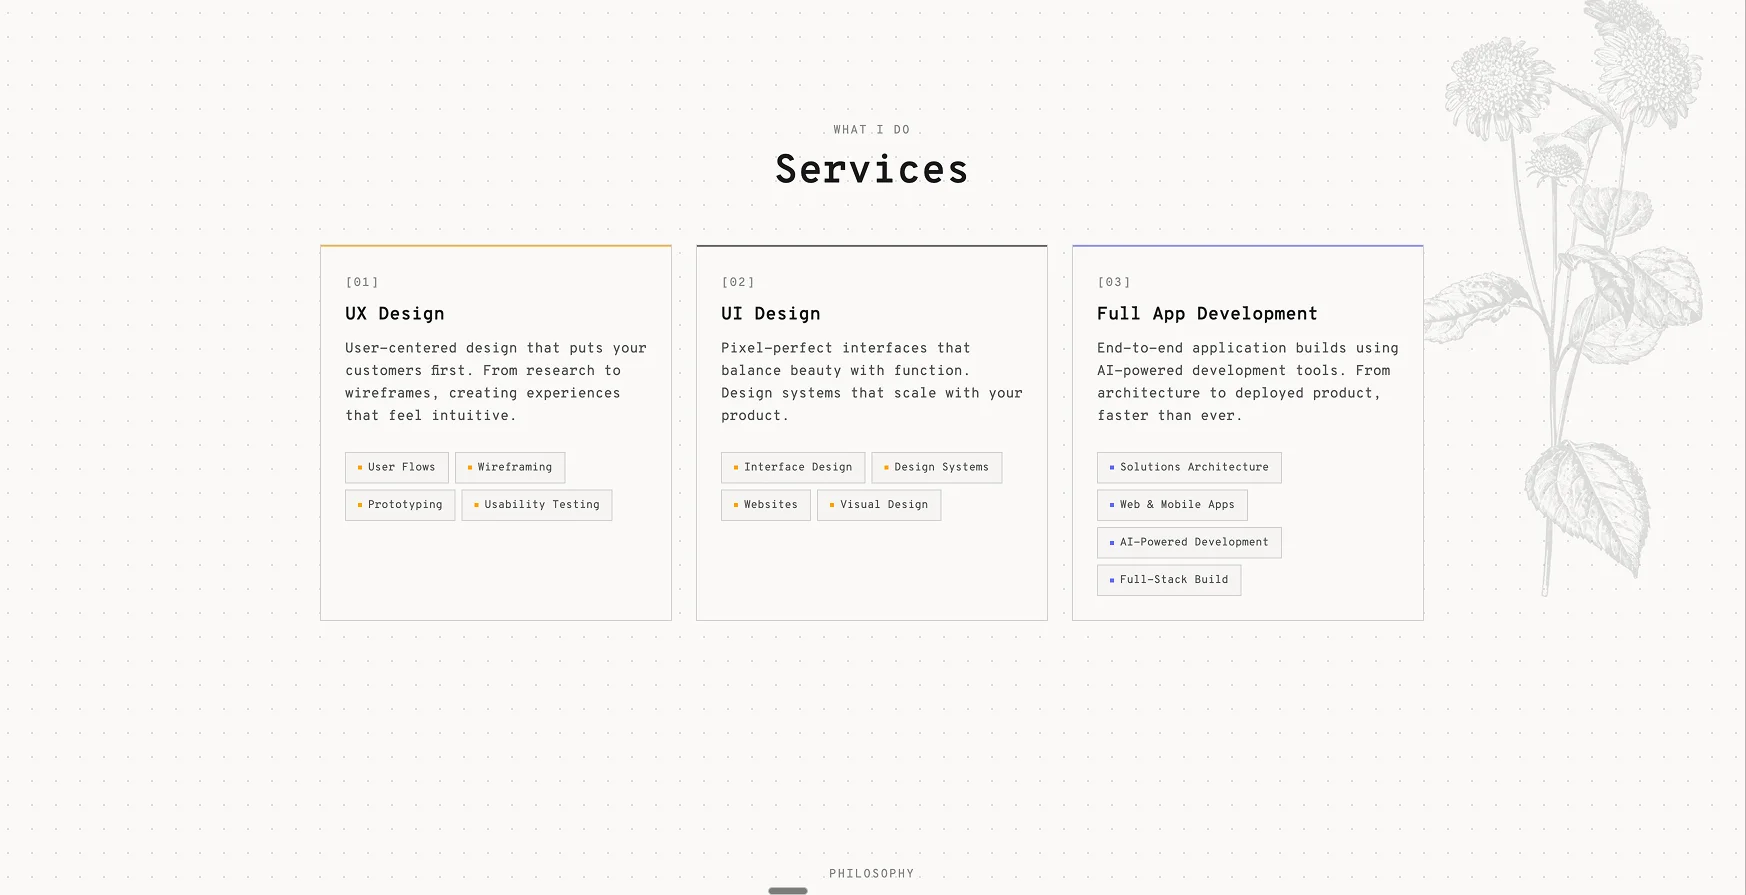
The image went in, but it was too small. So I followed up: "Could you make it 50% bigger, please?"
Perfect size. Perfect location. Until I stretched the browser window.
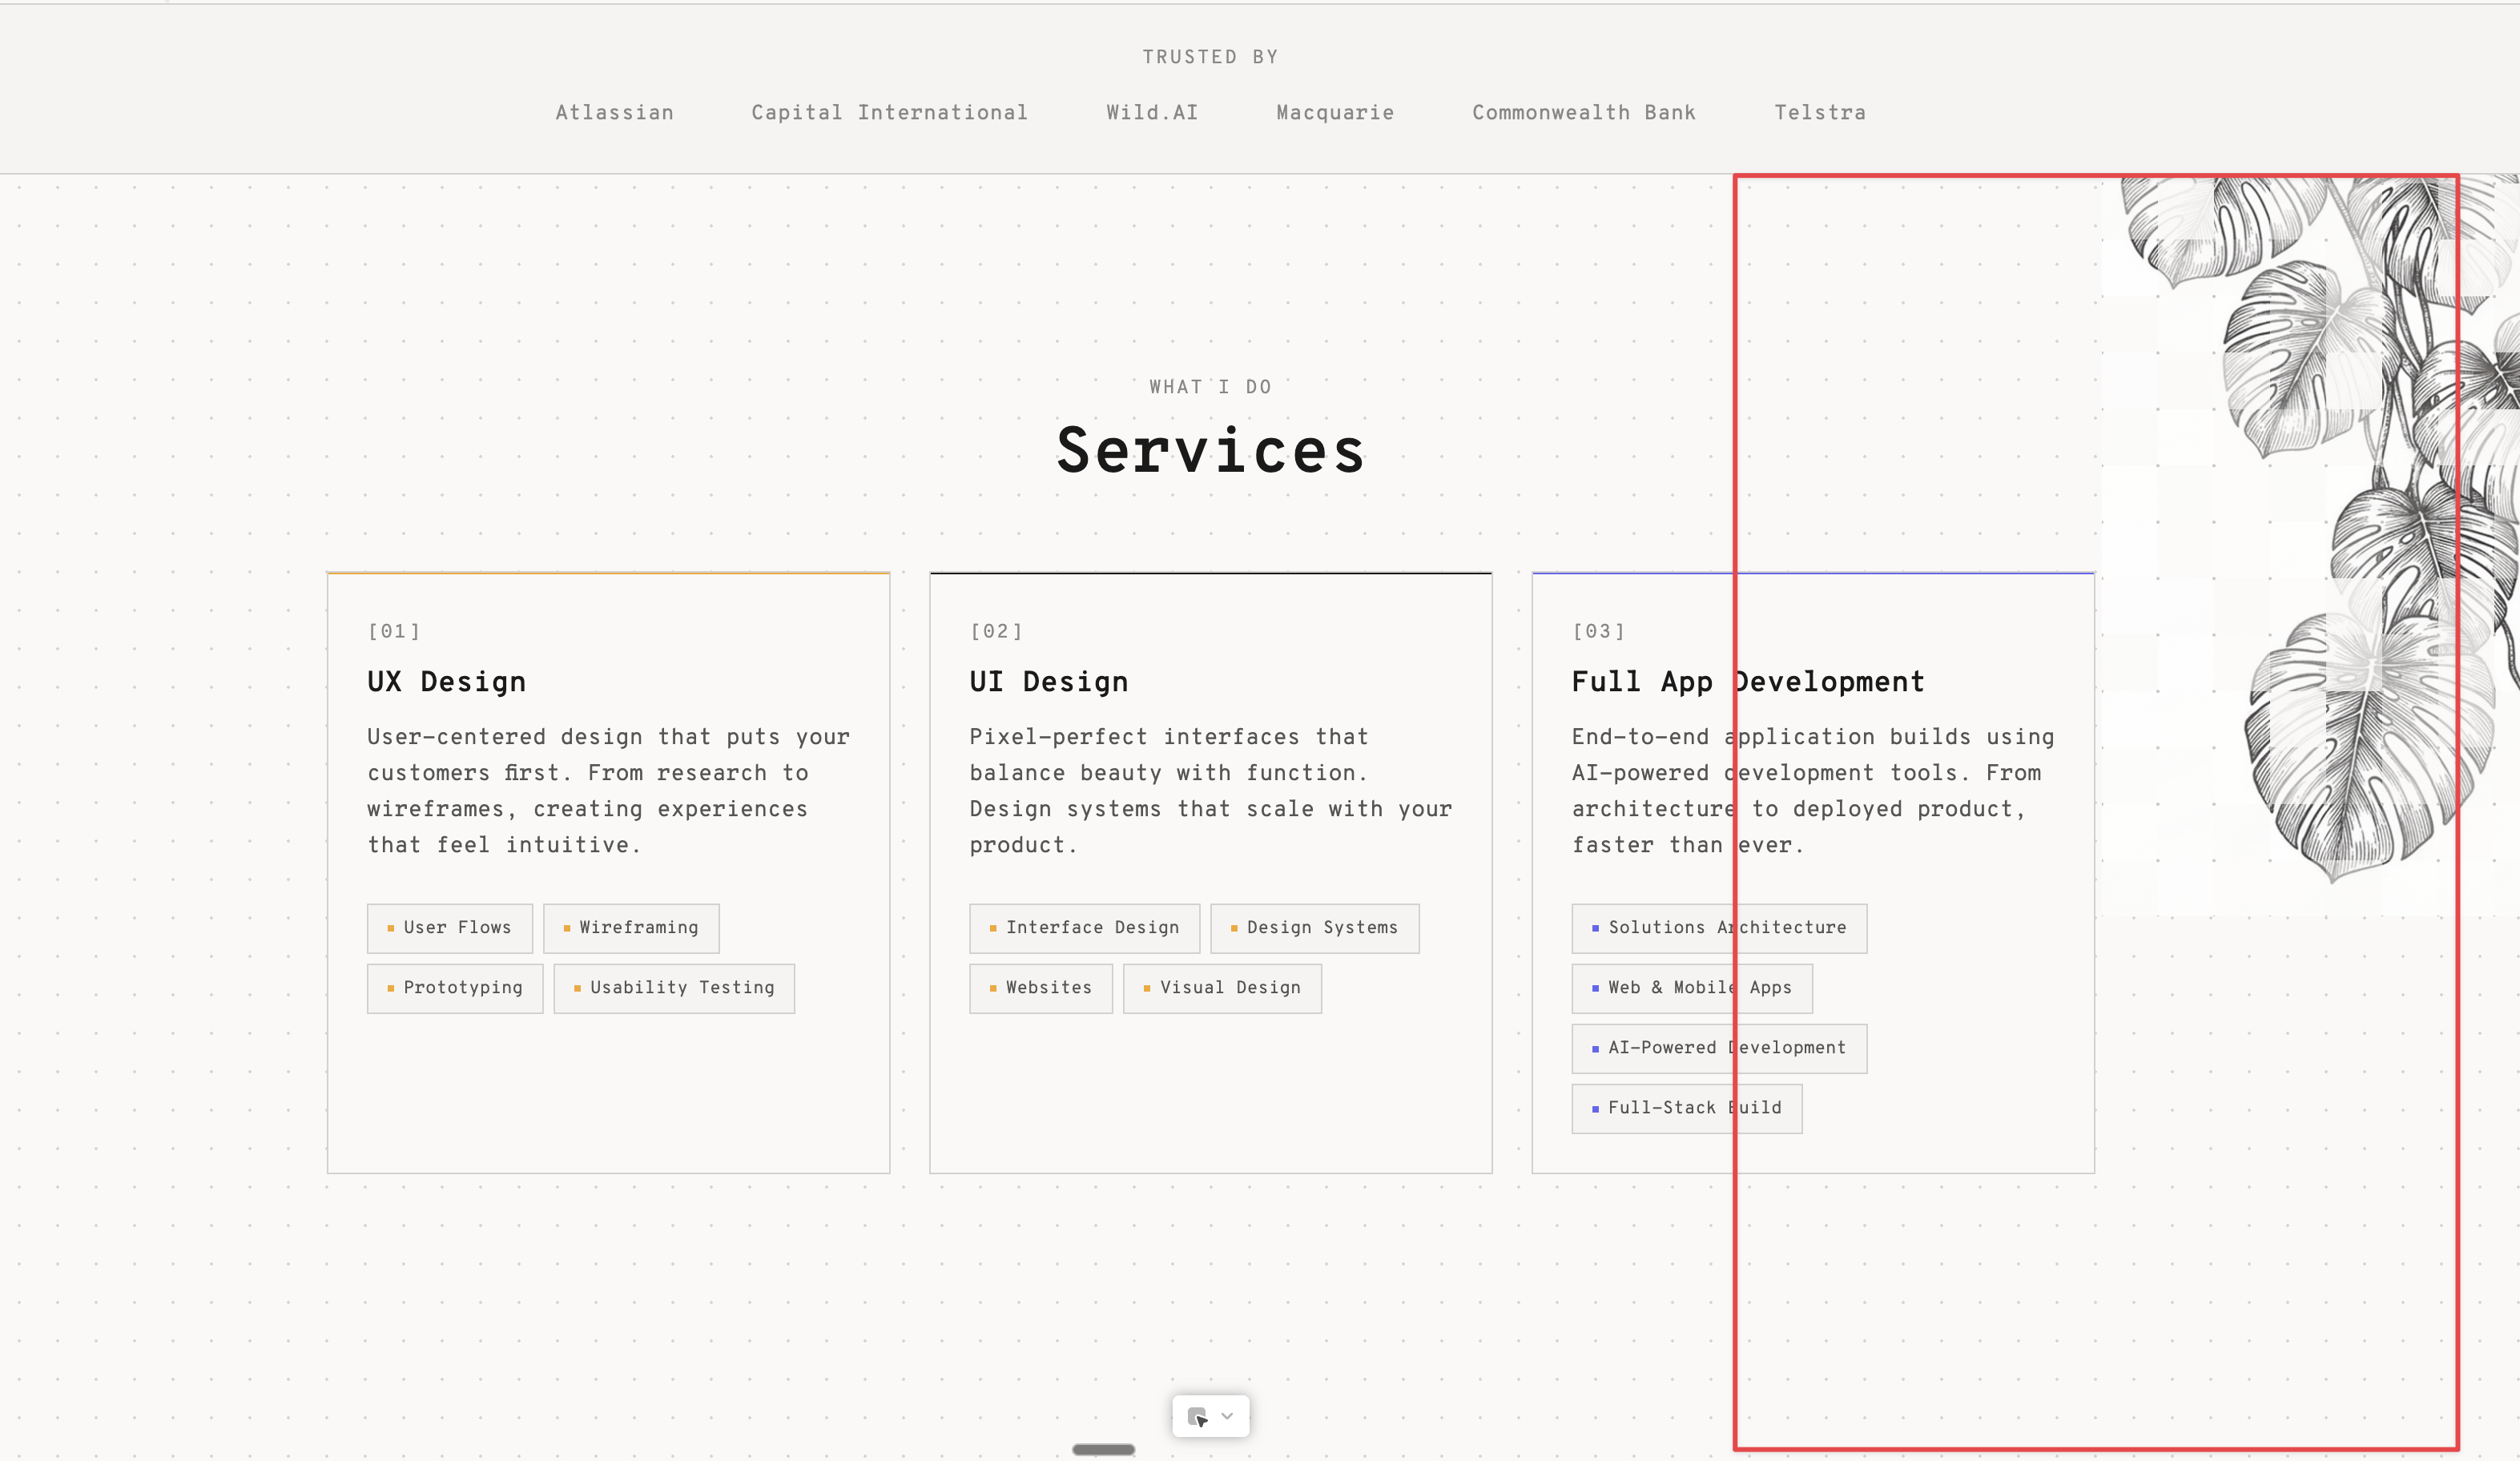
Step 5: The Positioning Dance
Responsive design meant my carefully placed plant was now in the wrong spot at different viewport widths. I tried to describe what I wanted:
"Could it please be 50% up into this container and 50% out of this container along the horizontal, but maintain where it is in the vertical?"
This didn't work first time. Natural language positioning descriptions can be ambiguous.
So I took a different approach. I reverted the changes, took another screen grab, and drew a red box exactly where I wanted the plant to be positioned relative to the card container.
Then I prompted: "Move it to where the red box is in relation to the three cards."
That worked.
The Prompts
Here are the exact prompts I used throughout this workflow:
Nano Banana Pro (Figma): "Generate a monstera plant hanging down from the top right of the section"
Nano Banana Pro (Figma): "remove ui and leave just plant"
Figma: Remove background tool + export at required dimensions
AI Coding Assistant: "Please add this and replace the existing image"
AI Coding Assistant: "Could you make it 50% bigger, please?"
AI Coding Assistant: "Could it please be 50% up into this container and 50% out of this container along the horizontal, but maintain where it is in the vertical?"
AI Coding Assistant: "Move it to where the red box is in relation to the three cards"
The Tools
What did this workflow actually require? Not much:
1. A Figma paid account (comes with Nano Banana Pro)
2. A decent LLM — in this case, Claude Opus 4.5
3. A little bit of design vision
That's it. No Photoshop. No stock subscriptions. No hours hunting for the right image.
The Result
A custom image, designed specifically for my UI. A custom treatment of that image. And a perfectly responsive positioning that works across viewport sizes.
This couldn't have been done before AI — at least not in a reasonable timeframe. Finding the right stock image, editing it to fit, animating it, and hand-coding the precise CSS positioning would have taken hours or days.
The whole process took minutes.
The lesson: stop searching for images that fit your UI. Start with your UI and create images that are born to be there.